
Adding the 'Hall' that an exhibitor will be exhibiting in could assist in the organisation of your exhibitors, along with your floorplans and could also be a useful field to have when exporting exhibitor information for a report.
If you would like to add Halls to you exhibitor, please follow the steps below:
STEP 1:
Go to Settings > Exhibitor Zone Settings
STEP 2:
You'll be greeted by a row of tabs. Select 'Stand and Stand Areas'. On the resulting page, find 'Halls' which will be the first section on the page and select 'Add Hall'
STEP 3:
Within the resulting pop-up window, you'll be able to give the hall a name and also fill in additional details such as square meter and a description. Once populated, click save.
STEP 4:
Go back to your exhibitor module in your CMS and select the exhibitor that you would like to add their hall details to.
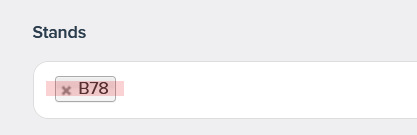
Clicking on the exhibitors stand details (e.g. B78 above), which cause a pop-up window to appear. Within this window, select your created hall from the drop down and 'Submit'.
STEP 5:
Save your exhibitor details, which will cause the system to update and display your created hall alongside their stand number/name.
--
Note:
This is the manual approach to adding halls, more suited to individual/small cases.
It may be more useful to perform an import of a 'Hall' field if you have a large amount of exhibitors at your show. The CMS will create all halls automatically from the resulting import of a CSV field. Just ensure the field is mapped to the 'Hall Number' field in the CMS!
Comments
0 comments
Please sign in to leave a comment.